Setup CVSNT for Personal Use
After developed a small system, I find it hard to keep track all versions of my source files, especially when there are bug fixes and enhancement requests. I have to create a whole new folder to keep track all changes in the past to allow me rollback to a specific version that I need. I'm sure there are version control system that could help me. In my day work, my company is using SCCS/CSSC but it requires Linux environment.
I asked my friends who do programming in Windows environment for suggestions. Most of them confirmed that CVSNT is the thing I need.
There are lots of good and detail guide out there to setup CVSNT, but I there is none that is simple and straight forward, or it's probably too complicated for my simple mind. Let me try to put up a simple guide, with my own experience.
Installation
Download the latest version of CVSNT (look for free version) and install it. Use typical settings. Restart PC.
Add Repository
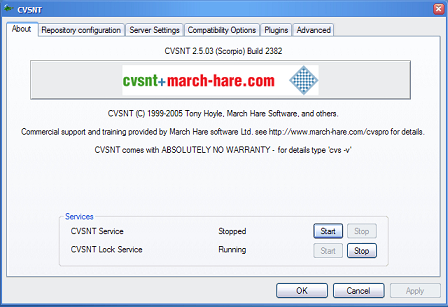
Open up "CVSNT Server" in control panel. Stop the CVSNT Service. You may leave the Lock Service running.
Then, go to "Repository Configuration" tab. Click "Add". Select a location that will serves as the repository for your source files.

Press "Yes" when it requests you to initialize.
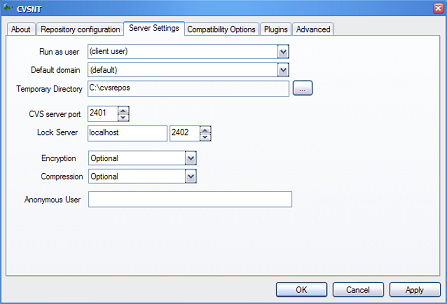
Next, go to "Server Settings" tab. Change the "Temporary Directory" to somewhere better.
Go back to the first tab, "About" tab. Start the CVSNT service that you have stopped just now.
Add User
Set environment with the following command:
set cvsroot=:sspi:localhost:{repository name}
e.g. set cvsroot=:sspi:localhost:/test
Use the following command to add a new CVS user:
cvs passwd -r {Windows account name} -a {user name}
e.g. cvs passwd -r Administrator -a englee
Enter password as requested.
Test Login
Enter the following commands:
set cvsroot=:sspi:localhost:{repository name}

cvs login

cvs ls -l -R
If you see a list after you entered the last command, you have got your CVSNT setup correctly! The next thing would be to learn to use it with command line! I think I will make another post on it in a few days.
If you find that my guide is too simple or simply incomplete, please go ahead to see the sites that I have referred.
Reference
If my article helped you solved your problem, consider buy me a beer!
Share this article: del.icio.us | digg it
Tags: CVSNT
Related posts: